Understand Basics of Photography

Learn DSLR Photography: Tutorials, Tips and Tricks

Learn how to start Photography

Learn how to use mobile phone and digital camera for photography

Learn creative photography

Learn how to click creative photograhy easily

Go beyond Auto Mode

Learn how to use your DSLR in Mannual Mode

Sunday, November 9, 2014

Understanding DSLR Shutter Speed

What is Shutter speed or exposure time?

Once you have understood the working of a DSLR camera the next step is to know about Shutter Speed. In layman’s language shutter speed is the time shutter of the camera takes to open & get closed. When the click button is pressed the shutter of the camera opens and fully exposes the camera sensor to the light that passes through the lens aperture. After the sensor is done collecting the light, the shutter closes immediately, stopping the light from hitting the sensor. The button that fires the camera is also called “shutter” or “shutter button”, because it triggers the shutter to open and close.

Measuring of Shutter Speed
Shutter speeds are measured in fractions of a second, when they are under a second. For example 1/8 means one-eighth of a second, while 1/750 means one seven-hundred-and-fiftieth of a second.

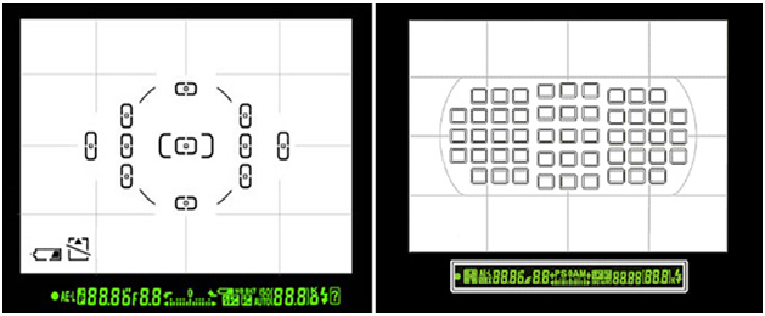
In the above figure the shutter speed has been set at eighth of a second.


Shutter Speed Values
Shutter speeds change as shown below.

Choosing a shutter speed one step faster than the current shutter speed means “increasing shutter speed by one step” and halves the amount of time the shutter is open. Choosing a shutter speed one step slower than the current shutter speed means “slowing shutter speed by one step” and doubles the amount of time the shutter is open.

Effect of Shutter Speed
Shutter speed hugely impacts a photograph. A photograph can become great and in the same scenario it can become unrecognizable if shutter speed is not adjusted accordingly. Every second impact the amount of exposure which the camera sensor receives when light passes through the aperture. Higher the domination of the shutter speed, higher is the shutter speed and vice versa.  

Shutter speed impacts the image in these ways
  • When the shutter speed is high the moving objects in the frame gets a clear picture and when the shutter speed is slow the moving objects gets blurry.
  • When the shutter speed is high the sensor gets exposed for less time to light thus the image would have controlled lighting effect (depending upon the lighting used at the shoot).
  • When the shutter speed is low the sensor gets exposed for more duration to light thus the image would have lots of light. 


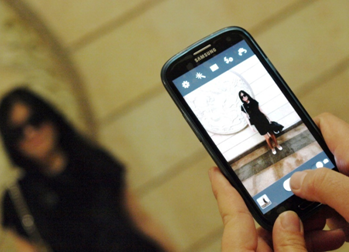
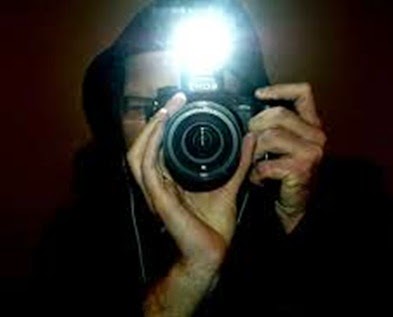
In first (Right corner) clicked image the shutter speed is high almost 1/500 and as a result the object is clear while it is in motion. In the middle image the shutter speed has been reduced to 1/160 due to which the moving part becomes blurry. In last (Left Corner) image the shutter speed is almost near to 1/40 which creates more blurry impact. 


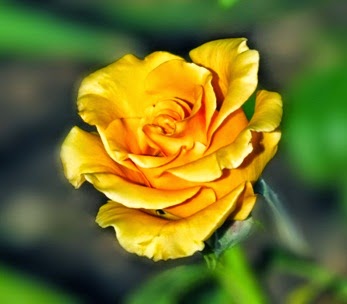
In case there is lot of light at the location and shutter speed is quite low then the image would come out similar to this one. 


Monday, August 11, 2014

How to use Focus in DSLR camera.

Once you know how a DSLR camera works the next step is to start using while understanding the Camera controls. In case you are using a DSLR camera in manual or semi manual mode then you can control all of these or some of the functions depending upon the settings

  • Focus
  • Shutter Speed
  • Aperture
  • ISO
In full automatic mode you don’t have an option to adjust these functions (except for focus).

Focus: It is more like an option available for the lens. If you will look carefully you could see a switch on the lens which says “Auto” and “Manual”.  The effect of both the options is quite similar and it depends upon the user how comfortable the user is while using it.

When “Manual” option is selected, it makes you control the focusing part of the lens. The rear end of the lens is kind of a moving ring. You can move it in clockwise or anti clock wise direction while pointing at a certain object thing then you could see that the image would get clear or unclear.  So, through this you can make adjustments and make the background of the image blur while making the subject more appealing. On the other hand certain subject can be made blur and background more clear.

In case, you choose the auto focus mode these are these followings options

AF-C (AF continuous, sometimes called continuous servo) is good use while capturing moving objects. When your camera is set to AF-C and you focus on a moving subject, for example a dog running towards you, the focus will stay on the animal as long as your shutter button is held half way down. In other words, the camera will keep on re-focusing the animal moves as long as you keep your shutter button held half way down.

AF-S (AF single, sometimes called single area AF) mode is used for capturing subjects that don't move, such as flowers, portraits etc. It locks the focus on the non moving object that you want to photograph. You can then recompose the shot and take the photograph.

AF-A is where the camera selects and goes between the last two modes. If it thinks the subject you are photographing is stationary, then it will automatically use AF-S focus mode. If it picks up that the subject you're photographing is a moving subject, then it will automatically use AF-C focus mode. This is also the default camera focus mode, unless you change the setting to AF-C or AF-S.

In Auto focus mode the camera also provides you with an option to control the focus points.  Focus points can range from 3 to 54 or more depending upon the camera. 


By controlling these points a user can choose on which part he or she needs to put more focus.
The points can be controlled under the AF-Area Mode and has these options
Dynamic Area AF:  Depending on which D-SLR you are using—you can select from several focusing options—9, 11, 21, 39 or all 51-points AF.
Single Area AF: Select a Single AF point and the areas surrounding it serve as backup—a significant advantage when shooting moving subjects. Select the 9-point option when you want to focus on erratically moving subjects with greater accuracy. When dealing with insufficient contrast for fast focus detection, choosing 21 or 51 points makes detection easier. The 51-point option also allows for 3D Focus Tracking, which uses color information from the 1,005-pixel RGB sensor to automatically follow moving subjects across the AF points.
Auto Area AF : It uses color information and special face recognition algorithms to automatically focus on an individual’s face, which is extremely helpful when there’s simply no time to select a focus point, or when using Live View in hand-held mode at high or low angles.

In the image the front part (tree branches) has been made clearer and the back ground has been blurred. The focus settings are AF- Single point with Dynamic Area AF.


Tuesday, August 5, 2014

What is a DSLR camera?

Once you are through with the use of mobile phone camera & digital camera, it’s time to move up the ladder.  The next step is to own a DSLR Camera but before that, you should know what actually a DSLR Camera is. Using a DSLR without understanding it is similar to driving a car without any training. 

DSLR Camera
A digital single-lens reflex camera (also called a digital SLR or DSLR) is a digital camera combining the optics and the mechanisms of a single-lens reflex camera with a digital imaging sensor, as opposed to photographic film. Earlier in a photographic SLR Camera instead of digital imaging sensor a Photography film was used on which image was captured and after processing it could be printed on paper.

Working of DSLR Camera.

How DSLR Camera Work
We all know light travels in straight direction and it is main element for photography. Without the source of light, photography cannot be done. The main parts of a DSLR Camera are
  • Lens
  • Reflex Mirror
  • Matte Focusing Screen
  • Pentaprism
  • Eyepiece
  • Focal-Place Shutter
  • Sensor

Each of these parts performs key role in photography such as
  • Lens helps in focusing, zooming in out and has the part which control the aperture. The light is passed through the lens, which is then reflected by the reflex mirror.
  • The Reflex Mirror helps in correcting the inverse image passed through the lens. The image is then projected through the Pentaprism and could be seen in the area of eye piece by the person. This entire process is in real time without any delay.
  • Behind the Reflex Mirror, the Focal-Place Shutter mechanism is located, which controls the speed of the shutter. The speed of the shutter is similar to the lid of the eye, the higher the shutter speed; the lesser is the time duration for the exposure of the light and vice versa.
  • Whenever a click button is clicked the reflex mirror goes down with controlled shutter speed and image is imposed on the sensor, which captures it in digital format. 

Friday, July 25, 2014

6 types of Funny Photographers you will meet in your life

Whenever we go to some new place we try to capture it through the lens and while doing so sometimes we do funny actions. We might not have noticed it but yes, there are a lot of people who click photographs in a funny way; let's take a look on few of them.

The learners: Photographers who have just started learning photography but did not know the purpose of lens cap, whether they are using the camera in correct way or not and haven't heard the word "water proof camera covers". 


Inexperienced Wild life Photographers: People who just saw a wild life show on discovery or Nat geographic channel and want to explore wild life photography but do not have the right amount of experience.


New sports photographer: There are a few people who get into sports photography but they forget about the distance they need to maintain with the sportsperson.


The risk takers: People who enjoy adventure in their life and just want to post the pics quickly on all the social networking websites to show off.


Leave no opportunity photographers: There are a few photographers who don't want to leave any opportunity to miss any shot at any cost, they would carry as many cameras as possible.


The yoga Practicing Photographers: People who would perform every known yoga exercise in the world just to click a pic.


So, which one you think you are??

Thursday, July 24, 2014

Things you need to know before clicking a photograph

Before you start using a Camera the very first foremost step you need to do is to generate a mindset for the photograph. By thoughts & mind set we mean to say the idea, concept, understanding of the subject and the way you want it to look after getting clicked. There are certain things what you need to know before clicking a photograph which are

1. What the photograph is all about: You should have a clear vision of what you want to show in your photograph. Is it a story? Is it a news article or a wedding photograph?


2. Frame to be captured: By frame we mean the entire surrounding which is to be captured in a single image. A photographer needs to exactly understand what all things he or she wants to show in that particular image.  By eliminating few unwanted things an average image could be turned into an attractive image. 


3. Understand the lighting: Different type of lighting makes different effects on the photograph. A simple photograph can be made dramatic by use of few color lights, for example – during a stage show lights play an important role.  Special emphasis need to be put in night or low lighting and it is advisable to click photograph in soft lighting.


4. Colorful or black & White: A photograph in colors might be able to communicate happiness but at the same time a black & white photograph might communicate it as a memory. Both have different effect on the viewer. For some black & white photographs are dull and for few they are just elite. So, the photograph needs to decide according to him or her.


 5. Angles: Different angles can change the perception of the image. A image clicked from the bottom of a subject can make it look like huge thing in similar way a image clicked from a corned can make a room seems too large. So, a photographer needs to understand what angle he or she should take and outcome of it.


 6. Can you feel the emotions: While clicking, the photographer needs to introspect whether he is able to connect with the subject or not. The deeper the bond with subject the better is the understanding of the photograph. Emotions could be related to sadness, enjoyment, care, guilt and every human feeling known.


 7. Color combination & background: A photograph needs to understand how he or she can highlight something. Color combination & background plays a crucial role in a photographer.


By practicing above mentioned points & understanding them a person can improve his or her basic photography skills to a great extent. 

Wednesday, July 23, 2014

Learn How to Start Photography

Before starting photography you need to understand & know your equipment i.e. camera. For beginners they can even use a digital camera or a mobile phone with camera feature. Earlier mostly film roll cameras were used however, in the current times hardly any one use it unless they are a die-hard fan of the film rolls and have their own dark room.
We cannot start directly from DSLR camera as we should know all the rules & theories related to DSLR photography. However, if a person cannot feel, enjoy, or have certain kind of urge to capture images then photography cannot be learnt. Having only technical knowledge and no conceptual knowledge would only lead to meaningless images.

We usually buy things and start using them without reading its manual, due to which we fail to understand the proper working & things it can do. After reading more about it, you would be able to know much more about the camera, such as:

Zooming Ability: knowing how close or how far the camera lens is able to click a picture. Sometimes you are too close to the subject and the camera would not allow you to click a perfect image. And at times when the subject is too far from the reach of the camera, even then gets blurred.

Image Stabilization: Whenever we click a photograph our hand moves a little and the image could get distorted. Blurriness/Distortion would mean that the image is not clear and have some defects like the subject has moved or some light related issue has happened. To reduce the blur error, digital cameras & mobile phones are equipped with Image Stabilization which results in better photography.
 Mega Pixels: An image is made up of pixels and it might range from 1.5 mega pixels to 22 Mega pixels depending upon the kind of equipment you are using. Currently, digital cameras and mobile phones both are offering minimum quality of 5MP to 44 MP (Ex- Nokia mobile Lumia -44MP Rear Camera).  
Exposure: Normally digital cameras & mobile phones have the ability to control exposure. Exposure refers to density of light to be allowed. We can control the density of light by controlling the exposure settings of the camera. The limit goes from -5 to +5, wherein the negative exposure leads to less density of light and positive amount leads to increase. Depending upon the light condition of an environment a person can make adjustments.
   
Scene Setting: Number of camera brands offers various type of scene setting options. Scene refers to the environment around the subject. The setting could be day light, night, scenery, Portrait, fireworks, Sports, Party, Panorama and Documents etc.  Some companies even provide option to detect face detection or smile capture ability.
Flash: Flash refers to the quick burst of light (located near the lens) faced towards the subject. It helps in increasing the amount of light. There are certain options like Auto Flash, Flash control, No flash etc. In Auto Flash the camera switches on & controls the amount of light itself, where as in flash control a user is able to control the amount of light to be put on the subject. Last option is No flash whereby a user can click photographs without using the flash.
By controlling the amount of flash different kind of effects can be put on a photograph. A photograph can be made to look like that the subject has a positive energy with lots of light around it and in another case the shadow of the subject can be shown. It all depends upon the creativity of the photographer.

Focus: It helps in selecting a point on which a photographer wants to focus. By use of focus setting a user can make certain things blur and put more focus on other. We must have seen a lot of pictures whereby the background is blurred and subject is in focus, it is done by the focus setting.

These days Digital cameras & mobile phones have these features wherein a user controls it by selecting certain predefined points or dots.

Once you have understood the control of the above mentioned settings then you are ready to click photographs like a professional. To further improve your photography read: what you need to know before clicking. 

Tuesday, July 22, 2014

Understand Basics of Photography

Photography is an essential skill required for a journalist however, with change in the time it has became one of the most popular hobby and a highly paid career. These days everyone wants to be a photographer and has started believing that they really are one. But they realize the reality after some time and eventually give up the dream. Before doing anything it is necessary to understand the basic concepts and working phenomena behind it. Every action is based on an equal reaction. The basics of photography start from the meaning of it.
What is Photography?
Photography is the art, science and practice of creating durable images by recording light or other electromagnetic radiation, either chemically by means of a light-sensitive material such as photographic film, or electronically by means of an image sensor.
The word "photography" was created from the Greek roots φωτός (phōtos), genitive of φῶς (phōs), "light" and γραφή (graphé) "representation by means of lines" or "drawing", together meaning "drawing with light.
In simple words we can say Photography is all about capturing the shots we see by using any equipment. Whenever, we see something, the image remains in our mind for just a fraction of seconds after which it washes away just like memories. Photography is one of the best ways to capture memories related to some occasion & event or any special day.
Equipment required for photography?
The equipment required to capture images and videos is called Camera.
A camera is an optical instrument that records images that can be stored directly, transmitted to another location, or both. These images may be still photographs or moving images such as videos or movies. The term camera comes from the word camera obscura (Latin for "dark chamber"), an early mechanism for projecting images. The modern camera evolved from the camera obscura.
Functioning of Camera:
The functioning of camera is very similar to the functioning of the human eye.
The cornea is a transparent structure found in the very front of the eye that helps to focus incoming light. Behind the cornea is a colored ring-shaped membrane called the iris. The iris has an adjustable circular opening called the pupil, which can expand or contract depending on the amount of light entering the eye. Then the image is projected on retina in inverse direction (Upside down) which is corrected by the brain.
In the same way mentioned above all cameras use the same basic design: light enters an enclosed box through a converging lens and an image is recorded on a light-sensitive medium. A shutter mechanism controls the length of time that light can enter the camera. Light plays a very important role in whatever we see. When we see something it’s the reflection of light on that particular object which makes them colorful.

As you have understood little bit about functioning of camera the next step is to learn how to start photography.

Share This Post to